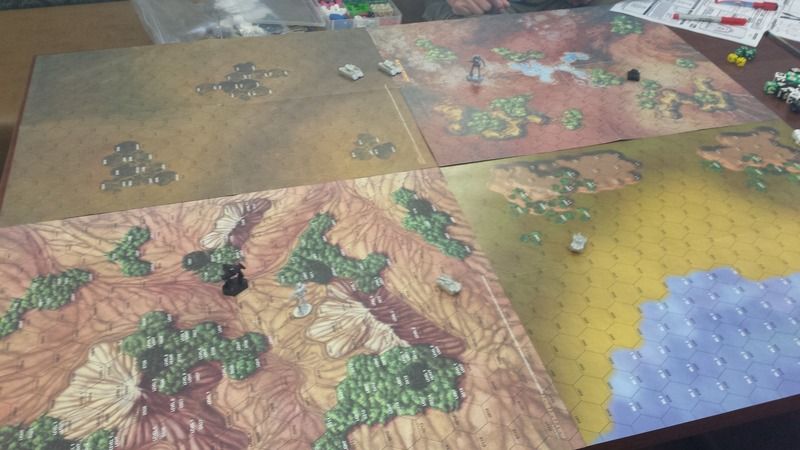
So sapper_sb and I have started a small friendly campaign against each other, and I decided to report each fight for the fun of it. We're using our own homegrown rule set. Three lances a piece, tracking XP and kills for skill improvement. The setting is thus:
"In 3030, in the closing days of the Fourth Succession War, the planet Devil’s Rock was taken from the Free Worlds League by forces of the Lyran Commonwealth Armed Forces. It was not a loss that House Marik would take lightly. In the late 3030’s, as Houses Steiner and Davion repositioned their troops for the pending attack on the Draconis Combine that would become known as the War of ’39, the FWLM attempted to take advantage of the situation by launching a series of raids in force against Lyran and Federated planets.
A combined arms task force from the 10th Marik Militia was dispatched to raid Devil’s Rock and, if practicable, retake it for the Free Worlds. With its front line forces redeployed to the Combine border, the defense of Devil’s Rock fell to the Kilbourne Draconis March Militia. These two forces would clash bloodily until only one was left standing. . ."
* * * * *
Acheron Lake, Devil's Rock
Sarna March, Lyran Commonwealth
31 January 3039Having grounded their DropShips on the hilly plains along the shores of Acheron Lake, the raiders from the 10th Marik Militia immediately dispatched a scouting element to conduct local reconnaissance and gather the lay of the land. Two days into this mission, the scout lance stumbled upon a heavy reconnaissance force from the Kilbourne DMM, scouring the Acheron Lake area for the invaders' base camp. Having reported the contact, the Marik recon lance closed in and launched an assault upon the slower but more heavily armed Davion troops.
Orders of Battle10th Marik Militia Recon Lance
- HER-2M
Hermes II- CDA-3C
Cicada- 2x GAL-100 Galleon Light Tanks
Kilbourne DMM Recon Lance
- VLK-QA
Valkyrie- J. Edgar Hovertank
- 2x Goblin IFVs
- 1x Foot Platoon (Rifle, Ballistic)
- 1x Foot Platoon (SRM)
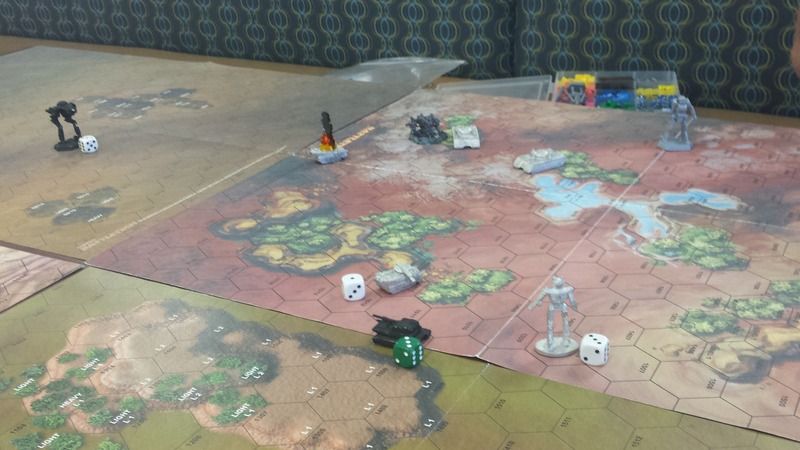
Turn One Moving up from the shores of Acheron Lake, the Marik lance's two BattleMechs moved into a wide flanking position, while the pair of Galleons made a more direct approach, using the hills and woods as cover from the
Valkyrie's LRM battery. The only shooting was a single pot-shot made by the
Cicada's PPC (which missed, incidentally).
 Turn Two
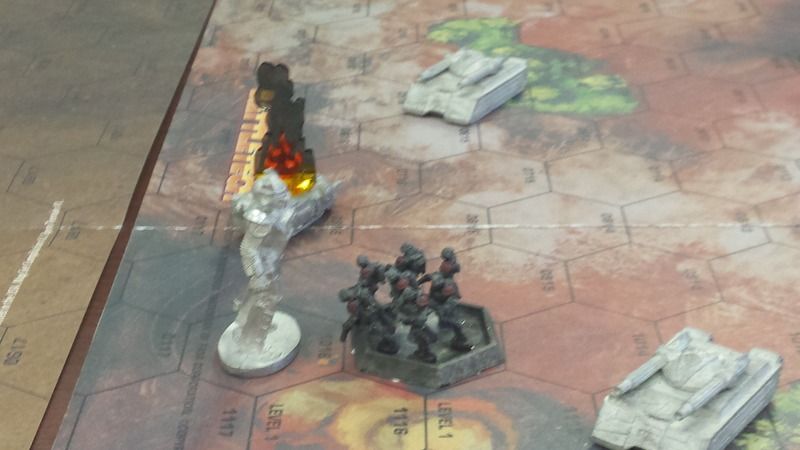
Knowing the speed with which their opponents were capable of, the Davion officers deployed their infantry just as the charging Mariks made contact with their lines. One of the Galleon crews, underestimating the amount of armor a Goblin packs (played by the Zhukovs), closed too rapidly and was left a burning hulk by concentrated fire from the enemy tanks. Meanwhile, Lieutenant Gaston de Bertholet and his
Hermes II, spotting the deploying infantry, unleashed Hell upon them, killing all but three members of the platoon with a combination of machine gun and flamer fire.
 Turn Three
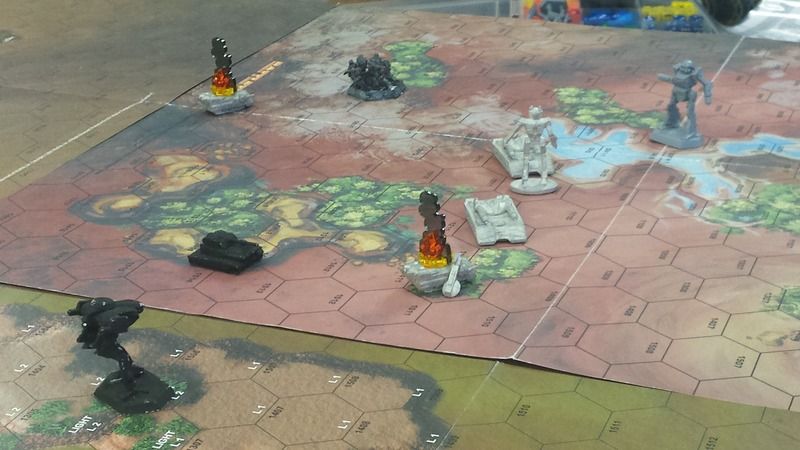
Rallying from the destruction of the tank
Cry Havoc, the Free Worlders remained "stuck in" with the Davion lance, foolishly trying to slug it out with the heavier enemy elements. The
Cicada closed to short range, its PPC tearing into the now-empty Goblin and its machine guns finishing the butchery begun by the
Hermes. Meanwhile, the second Galleon and the J. Edgar dueled with each other -- the Edgar's heavier armor and superior speed giving it the upper hand -- while the
Valkyrie fired into the melee rather ineffectually. The SRM infantry deploy from their carrier and set up in the woods, daring the 'Mechs to stay in their range.
Turn FourFeeling the weight of the damage piling up, the Marik 'Mechs withdraw from the scrum and attempt to re-consolidate their position. This gave the Davions the space to move up a little, and they pressed the attack. The J. Edgar (played by a Vedette) disrupted these plans, plinking away with its laser and machine guns while the Goblins redeployed to bring their large lasers into play. One of the Goblins' front armor was perilously damaged and its motive system shot to Hell and gone, but retained its bite and refused to die, much vexing the Marik commander. . .
 Turn Five
The Free Worlders try to retake the initiative, the
Hermes once again closing the range in a last-ditch attempt to kill that stubborn Goblin -- an attempt which narrowly fails, despite everything the remnants of the lance throws at it. The return fire finishes the second Galleon, however, and strips the armor from the
Hermes' right side and a leg of the
Cicada. With half the lance dead and the other half losing armor at a dangerous rate, the Mariks wisely choose to withdraw and leave the Davions as bloody victors.
 Thoughts
When building my recon lance, I focused on speed and close-range hitting power, while my opponent went for a more heavily armored approach. We did kind of screw up the APC rules -- neither of have played in a couple of years -- but we decided not to worry about it. My dice never really warmed up, while his started cold and heated up in Turn Three, when he finally started landing LRMs and large laser shots. I tried my damnedest to kill that Goblin, but it left the field under its own power with no armor and just two structure points on its glacis. I decided to just throw in the towel rather than risk another turn to kill it, since my
Hermes II had already had one hit go internal and the
Cicada was about two shots shy of losing a leg.
In two weeks, we play with our striker lances. I have a LOT more firepower and armor in that formation, so I'm hoping to give a much better showing. . .


