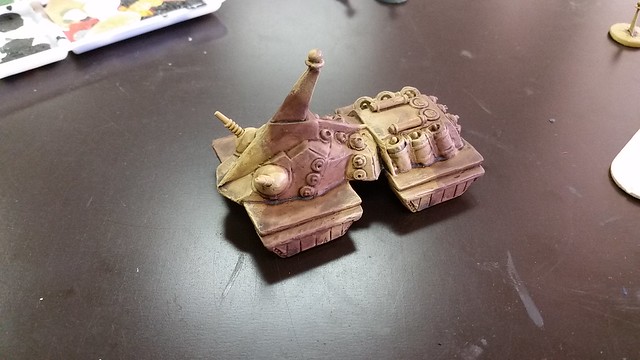
Some of you will remember this poor beast.
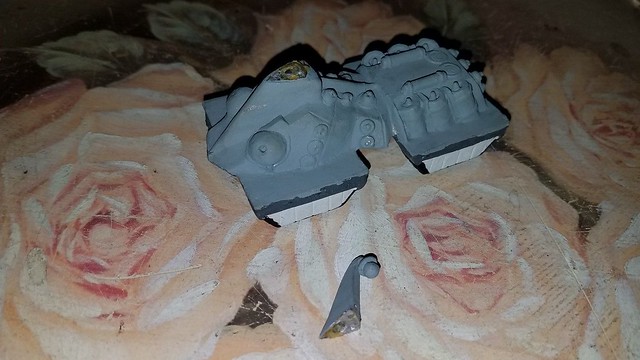
I found it on eBay last December and managed to win it for about $35 plus shipping. It's an original Martian Metals Ogre Mk. V, released back when the game was still being published by MetaGaming, circa 1978. When it arrived, it looked even worse than in the photo. It had been painted with what appeared to be latex wall paint, it was badly dinged and dented, the tower was ready to snap, and the tracks had been glued on with some sort of horrible cheap epoxy. It was no wonder that I'd gotten it so cheap, despite its rarity and historical value.
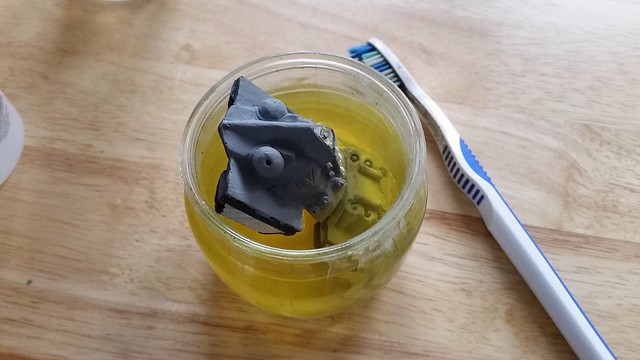
It went directly into the acetone. What followed was literally days of soaking and gentle scrubbing with a toothbrush. I couldn't even tell if it was genuine...
...it is. I have to give a shout out to our own Paint it Pink and Steve Jackson (yes, THAT Steve Jackson) for their assistance in identifying this miniature. PiP shared her collection of images - many of which simply don't exist on the internet - and SJ took a picture of his own MM Mk. V. From them, I not only was able to authenticate this particular miniature, but also to see what the missing gun barrels should look like.
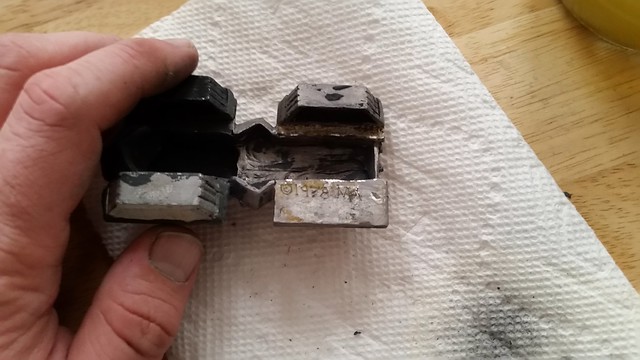
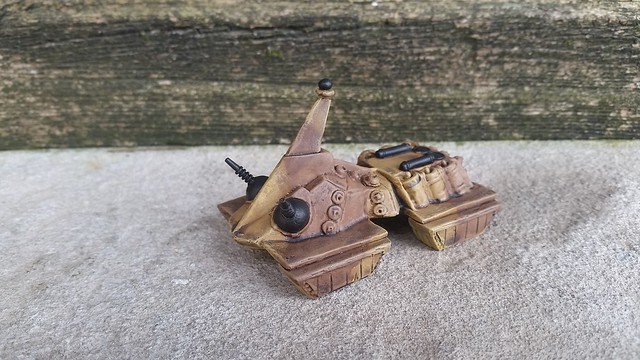
I finally got all the paint off...
...followed by the remaining tracks. I repaired the sensor tower by simply cutting the dome off, trimming away the damaged section, and reattaching the dome on top. I did a little reshaping with a file and glued the tracks back on, this time spacing them out further for a "bulldog" stance.
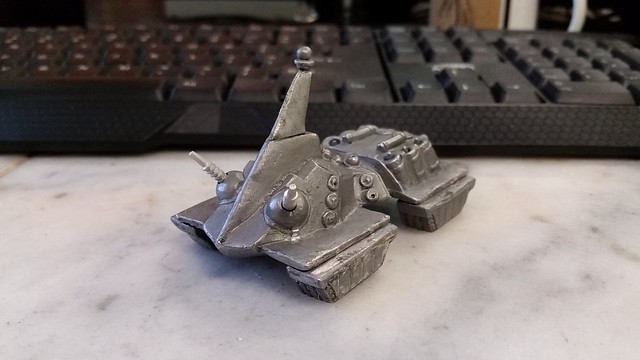
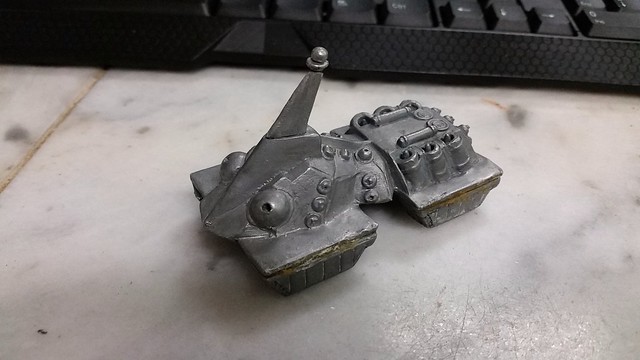
The main batteries were easy. I just used an extra set from a 2000 Steve Jackson Games sculpt. They're not exact matches to the original, but close enough.

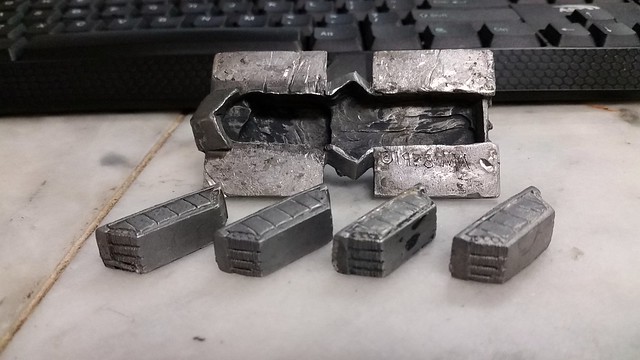
The secondary batteries were trickier. I could've modified the miniature to use more spare parts, but I didn't really want to alter it any further. The original Martian Metals sculpt came with ridiculously thin gun barrels - sometimes broken right in the package - so I decided to duplicate them using brass rod. Each is made up of two lengths of rod of different diameters, one inside the other.
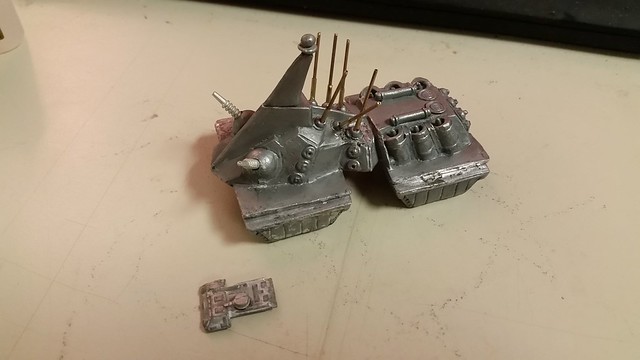
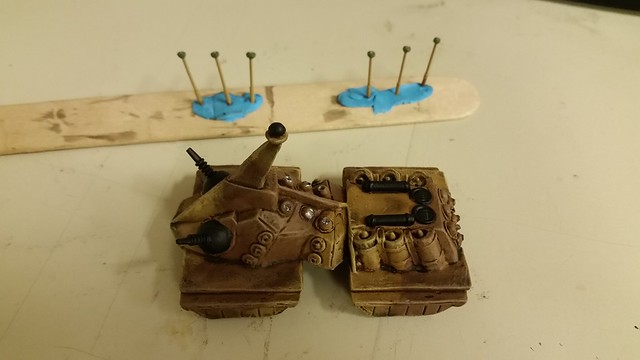
It took a while, but I eventually got them all done. I then gave the miniature a coat of Army Painter Desert Tan spray and set it aside to work on other projects.
I decided to get working on it again a few days ago. I added some swathes of Army Painter Leather Brown and washed the whole thing with Army Painter Strong Tone, then set it aside to dry. As you can see, I'd removed the secondary batteries.
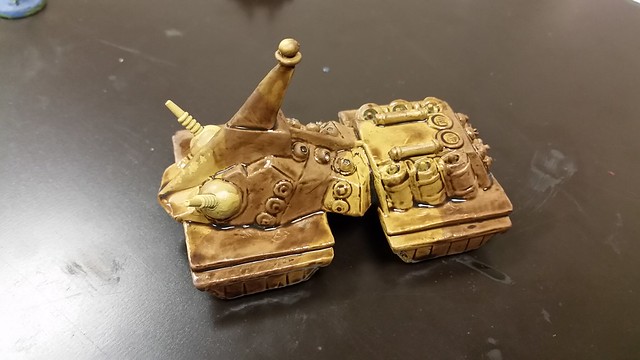
I then started highlighting. For the tan sections, I did a heavy drybrush of just Army Painter Desert Tan, followed by a 50/50 mix of that and Army Painter white.
The brown areas also got a heavy drybrush of AP Leather Brown, followed by a mix of 50% that and 25% each while and Desert Tan. I also started adding the first detail color, AP Matt Black.
I decided to improve the secondary batteries before reattaching them. A little green stuff made credible "muzzles."
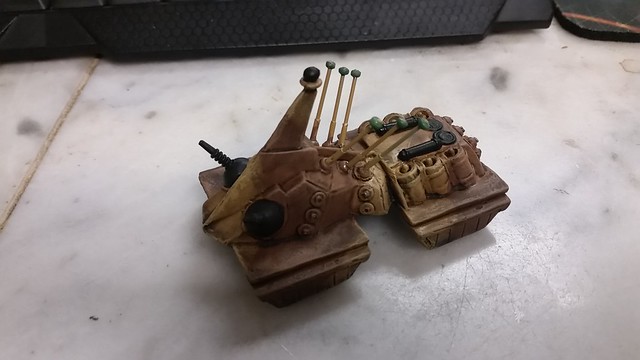
Here they are installed. Yes, they're a bit oversized and mismatched, but so were the ones on the original sculpt. I then went ahead and painted a lot more black on the piece, then finished up the details today.
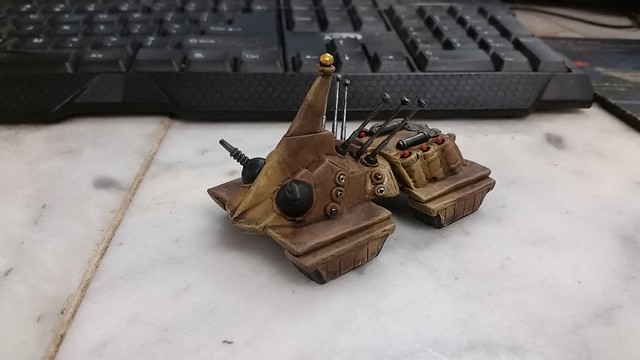
...leading to the finished piece, seen here from the front...
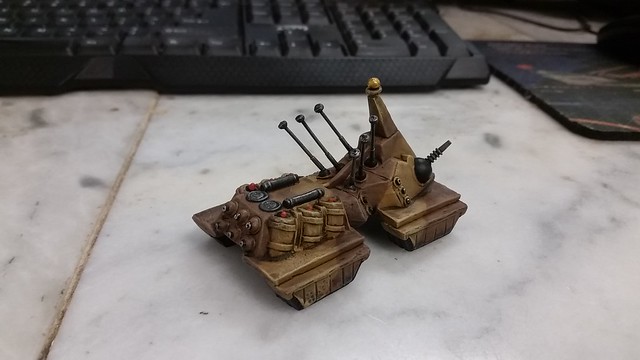
...and the rear. Finally, this classic miniature has the paint job it deserves. No, I'm not going to win a Golden Demon sword or the equivalent with my techniques, but when you look at the before and after shot:

I think I'm allowed a touch of pride in the job I did here. This poor tank spent the past four decades neglected, and now it is ready to hit the table again. If you made it this far, thank you!


